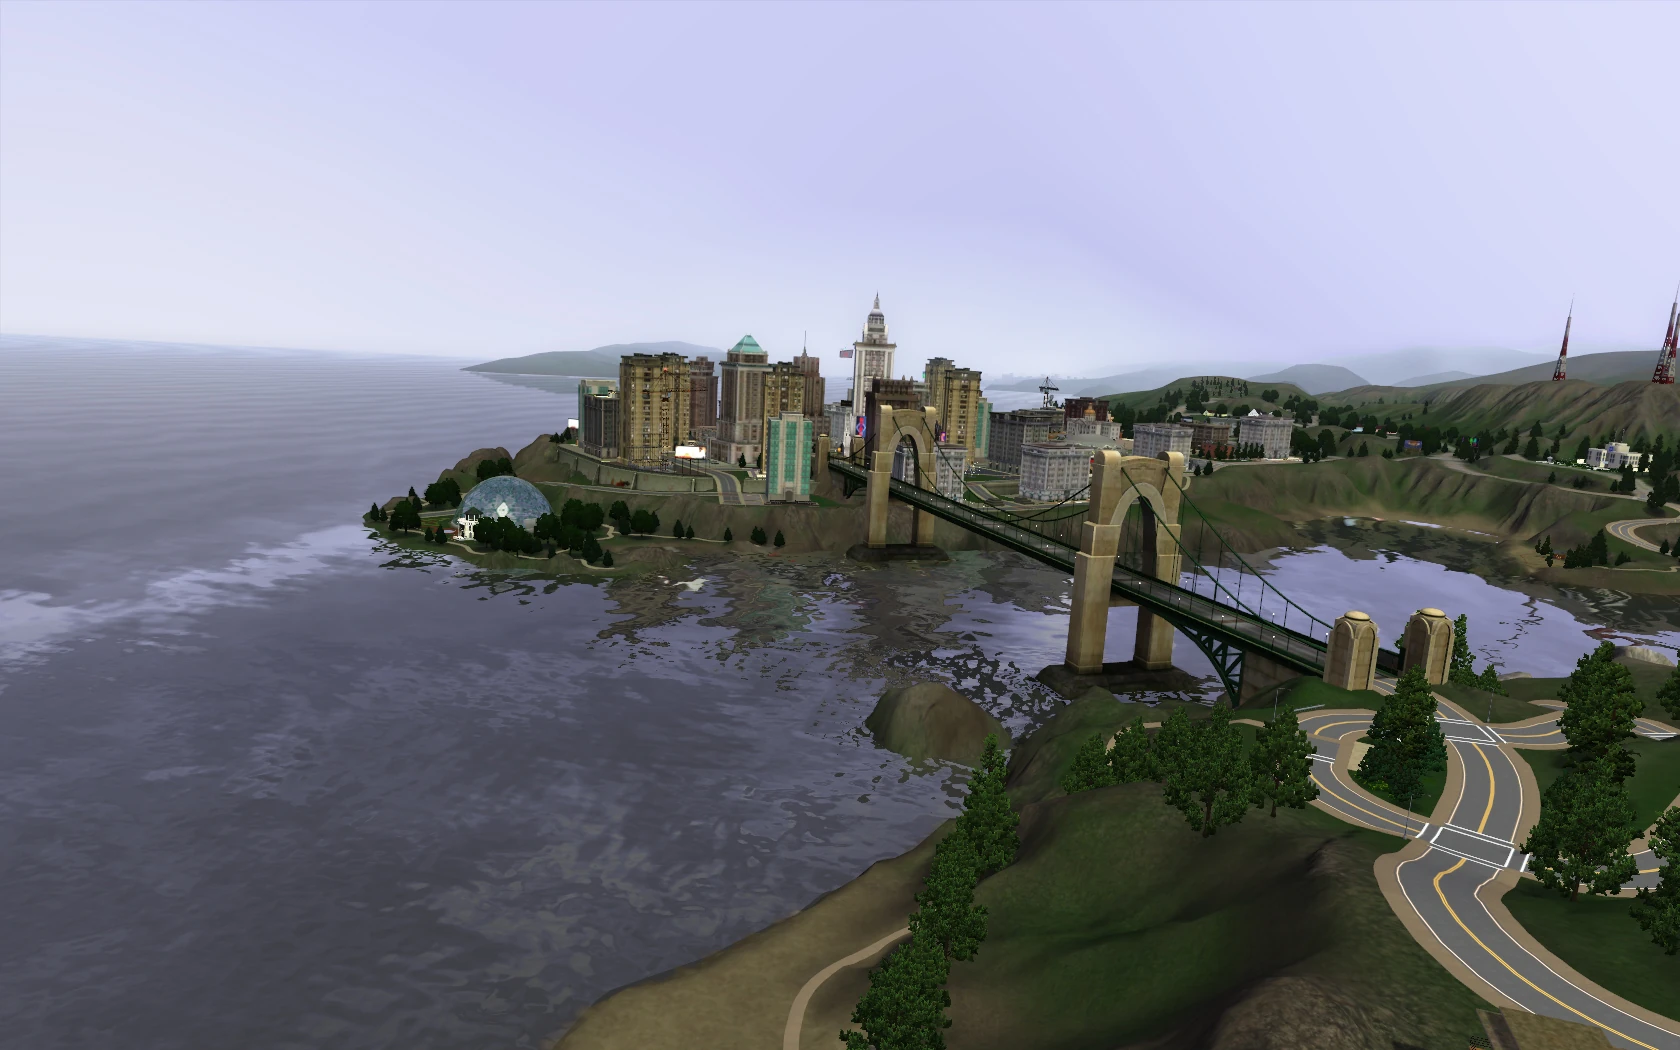
The initial flyover is the short intro that plays whenever you start a new game in a world, or when you visit a World Adventures location.
The flyover will add flavor to your world, and it also determines where the camera will be positioned upon initially opening the world.
This Tutorial will show you how to make your own, from editing the ini files to importing them into your custom world.
Required[]
Extract the Ini files from the France world. You need instance 0x3EC0CF0CC4A6540F and 0x7886A7F59355762F.
The Ini files: WorldSpecificParams[]
To create a flyover you'll need to edit the corresponding ini files. After downloading them, take a look at the files. Both of these are exported from the France world; they work when you import them, so you should already be able to learn a little about how they work by reading through them.
One of them, World.ini, contains the 'WorldSpecificParams':
[WorldSpecificParams]
LotLODHeightThresh = 400;
GameEntryFlyThrough = 3;

;;;;;;;;;;;;;;;;;;;;;;;;;;;;;;;;;;;;;;;;;;;;;;;
;;
[LotRenderSettings]
; Color of wall tops (r,g,b) each in [0,1] range
WallTopColor=0.167 0.154 0.115
This file is what initializes several specifics of a world. One of these is the flyover: GameEntryFlyThrough.
LotLODHeightThresh I assume detemines the distance in height at which lots will switch to their low-detail form. This is the same value in all worlds, so I suggest you leave it as it is.
The LotRenderSettings section allows you to change the color of the top of walls, e.g., somewhat gray by default, but brown in Egypt.
As you can see there are other uses to this file than just initializing your flyover. However, if you'd rather not change these you can edit the file to make it look like this:
[WorldSpecificParams]
GameEntryFlyThrough = 3;
Now the file only intializes the flyover and leaves everything else the way it is by default. If you've made any changes, you need to save it. KEEP THE EXACT SAME NAME.
The Ini files: Flyover file[]
CameraFlyThroughPath.ini is the file that contains all the information about your flyover; from the path that it will follow to the time it takes to complete it. The only part of the file that has any function, and which you need to edit, is this:
;; Path 1: Game Entry

;;;;;;;;;;;;;;;;;;;;;;;;;;;;;;;;;;;;;;;;;;;;;;;;;;;;;;;;;;;;;;;;;;
;; Custom France Fly though proof of concept

[3_0]
Position = (991.67, 42.26, 855.10)
Rotation = (-71.87, 114.14, 0.00)
FOV = 50.00

[3_8]
Position = (950.74, 57.66, 832.79)
Rotation = (-1.85, 122.30, -5.00)
FOV = 50.00

[3_16]
Position = (887.33, 58.11, 830.41)
Rotation = (-7.11, 149.53, 5.00)
FOV = 50.00

[3_24]
Position = (938.01, 48.50, 894.16)
Rotation = (-30.74, 137.36, 0.00)
FOV = 45.00
As you can see this is the file from France. You can change the name (Custom France--) to anything you like, or leave it as it is - it really doesn't matter.
The explanation within the file itself should already be quite solid, but we'll go over it anyway:
;; [I_T]
;; Position = (x, y, z)
;; Rotation = (x, y, z)
;; FOV = x
'I' is the integer index of the path. In other words, it's its name. I believe you can change this to any number that is ≥0. There isn't really any reason to make any changes to it, but if you do, make sure that it's the same number used in GameEntryFlyThrough = 3; from the 'WorldSpecificParams' file. Within the same flyover path, this number should always stay the same, as you can see in the tutorial entry in the ini file.
'T' indicates the time in seconds. This must always be 0 at the start of the path. The less time in between points, the faster the camera will move, and naturally: more time equals slower camera movement.
One thing to keep in mind is that most EA flyovers last roughly 30 seconds; this should be enough. Making it last much longer will probably bore people, unless you manage to keep it interesting.
'Position' determines the position of the camera along the xyz-axis. This is determined in 'float values'. With the method that we'll be using to create the camera path it isn't really important to know exactly what this means, but if you're using a large map the values will be anywhere in between 0 and 2048 when you're within the boundaries of your world (A large map is 2048x2048). However, you can go beyond the boundaries so the values can also go beyond these.
'Rotation' Determines the rotation of the camera along the xyz-axis. These values are important, as you'll need to set them manually (Except z, more on that later). It is tricky business and requires some mathematical insight.
Important:
- Rotation values can be anywhere from -360 to 360 degrees.
- 0, 0, 0 is often a safe starting point
- x is up and down rotation, e.g., looking up and down.
- y is left and right rotation, e.g., a spinning globe.
- z is left and right rotation, e.g., a rotating circle.
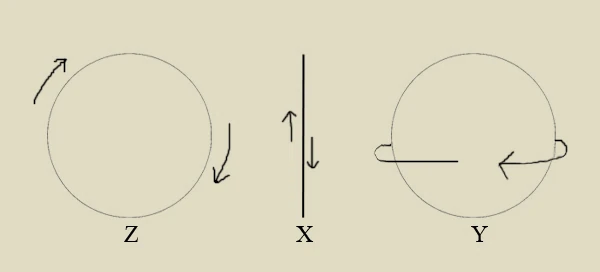
A full circle is always 360°, but the negative values help determine which direction the camera turns in. Going from 0° to 90° is a quarter turn to the right/upwards, whereas from 0° to -90° is a quarter turn to the left/downwards.
'FOV'
stands for 'Field of view'. This is also measured in degrees. Put simply, this is how much you either zoom in or out. What is important to remember, when editing this value, is that the starting- and the end point of your flyover path both need to be at 45. It avoids 'jumps' in the FOV, as this is the default value.
You don't need to edit this yourself; more on that later.
Making your own Flyover[]
Now that you understand the basic principles, you can begin working on your own flyover! There is, however, a couple of things you need to be aware of before you begin:
- Have your world installed.
- Know how to use the in-game first-person camera. This is accessed by pressing 'TAB' on your keyboard. When in this mode, use the AWSD-keys to move around, Z/X to zoom in and out, SHIFT+A/D to roll the camera. You need to be playing an active household to use this.
With these points covered you can finally begin. Open your game and load up your world. When that is done, you should start looking for the position of your opening shot.
When you've positioned the camera in first-person mode (TAB), and you're happy with the angle, you need to save it. This is done by pressing CTRL+5/6/7/8/9 on your keyboard. You can save the angle to either one of those numbers, but keep in mind that only one angle can be saved to the same number at a time. When you save another angle to the same number, it will overwrite the previous one.
Now Alt-TAB out of your game. Go to Documents>Electronic Arts>The Sims 3. Find the file 'WorldPresets' in this map, and open it.
You should see something like this:
[Camera5_video]
CameraPosition = (1740.69, 82.35, 1229.88)

CameraTarget = (1813.83, 71.65, 1191.11)

CameraLevel = 0

CameraRoll = -30.72

CameraFOV = 84.99

[Camera6_video]
CameraPosition = (1792.18, 21.38, 1321.88)

CameraTarget = (1797.01, 21.92, 1315.68)

CameraLevel = 4

CameraRoll = 0.00

CameraFOV = 15.00
You'll see these values for every camera counting from 5 to 9. When you save an angle to one of these numbers in your game, this file is updated with those coordinates.
To edit your flyover, you'll need to look at the [Camerax_video] of the angle you've just saved (x being that angle). CameraPosition is the one we'll need. The corresponding values are (x,y,z), and you can copy these numbers to your Flyover ini. Place these behind Position. When you've done that, you have set the position of the camera for your first point in the path!
If you've also zoomed in or out, you need to copy the value behind CameraFOV and place this behind FOV.
This is, however, only half of the work. When you edit the position of the camera, it will only alter where it stands on the xyz-axis; not which way it's facing. To change this, you need to alter the Rotation values.
This might be difficult, and it will require some trial and error. However, there is one axis that doesn't need you to specify it manually: the z-axis. When you roll the camera it'll also be recorded within the 'WorldPresets' file. This value is specified behind CameraRoll. You can copy this value and put it where the z is in (x,y,z).
Now that you've set one point in the path you'll need to repeat this for the next points until you're happy with your flyover. There is four points in the original ini file, but you can increase or decrease that. Just make sure that there is at least two points in the path.
One other thing of note is the final point in the path. This is where the flyover will switch into map view, and its coordinates do influence where the map view will center on. Getting this transition to be smooth will be tricky, so do pay extra attention to it.
When you're done, save the file. KEEP THE EXACT SAME NAME.
Testing/editing your flyover[]
Making the perfect flyover will be a tedious process, one that requires a lot of trial and error. Luckily, you can edit it while you have your game open, if you have your world installed. Here's how:
Go to the main menu of your game (Important!) and ALT-TAB. Now go to Documents>Electronic Arts>The Sims 3>InstalledWorlds
Look for your world file there and open it with s3pe. In s3pe go to Resource>Import>From File..
Select both the ini files that contain the flyover information. Click 'Open', then make sure in the next window that 'Replace Duplicates' is checked. Without changing anything else select 'Import'.
Now go to 'File' and select 'Save'.
Exit s3pe.
When you re-enter the game and start a new game in your world, the flyover should play. You can repeat this process to quickly see how the changes you're making to the ini file are translated in-game, and because you've installed the world and are editing that file, your original world file will sit safe in the CAW directory.
Adding the flyover to your world and sharing it[]
When you've finally reached a result that you're happy with, you can import the flyover into your world. Remember, ALWAYS BACK-UP any world files that you use to edit in CAW.
To add this to a world that you want to share, you need to import it.
Go to Documents>Electronic Arts>The Sims 3 Create A World Tool>UserToolData>Worlds
Once there, find the world that you want to add the flyover to and open it with s3pe. You need to open the .world file, not the .settings file.
In s3pe, go to Resource>Import>From File..
Select both the ini files that contain the flyover information. Click 'Open', then make sure in the next window that 'Replace Duplicates' is checked. Without changing anything else select 'Import'.
Now go to 'File' and select 'Save'.
Exit s3pe.
Open CAW, export the world you've just added the flyover to, and you're done!