This tutorial will explain how to create a height map from elevation data of real life places in the world. This can be used for creating worlds that are based on real locations.
Downloading the height map from terrain.party[]
The website terrain.partywas primarily designed for downloading height maps for using in City: Skylines, but can easily be used for CAW. Note that not every area will have height map data.
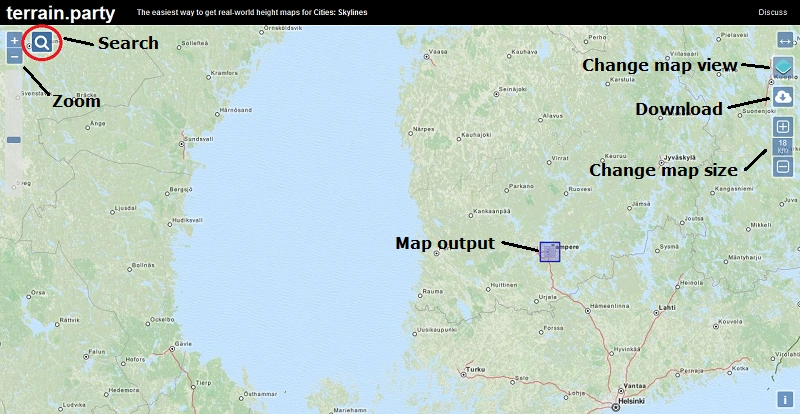
Move the map output box to the place that you want a height map of. If your map output box is off the screen you can recenter it by clicking on download, then OK, then cancel. Or you can immediately jump to a particular place by searching it for it.
When you have moved the map output box to where you want it, and resized the box if necessary, click the download icon. Name the file and the zip download should begin.
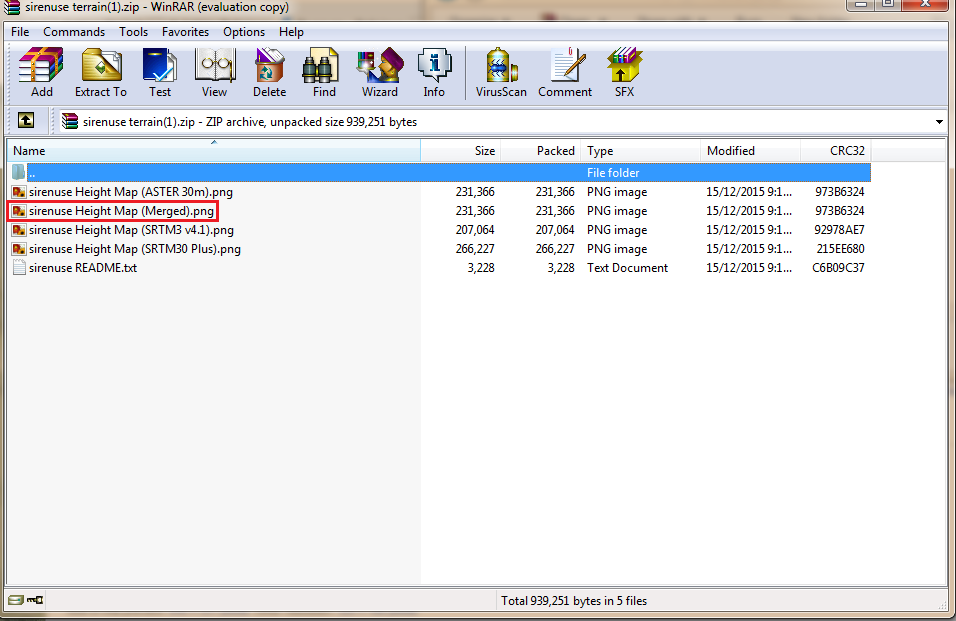
The zip file should contain several height map images. Look through them to see which one you prefer but generally the most accurate will be the 'Merged' image.
Formatting the file[]
Resizing the image[]
First, you need to resize the image to a CAW compatible size.The standard sizes are:
Tiny: 256 x 256 pixels
Small: 512 x 512 pixels
Medium: 1024 x 1024 pixels
Large: 2048 x 2048 pixels
However, Appaloosa Plains uses a height map that is 1536 x 1536 pixels. Intermediate map sizes are possible as long as they are in multiples of 256. So another map size that is possible is 1280 x 1280. You resize the image file in any image editing program. For this tutorial I will show you how to do it in the Windows default program paint.
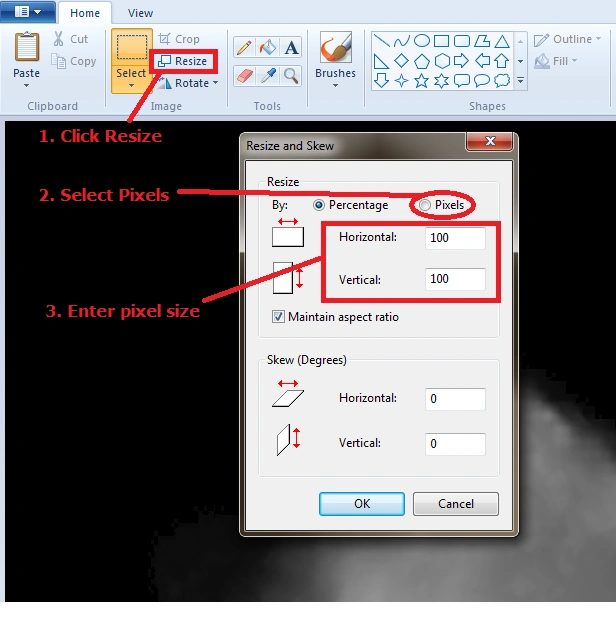
When you have resized the image to your desired map size click save.
Converting the image to 16 bit PNG[]
CAW uses height maps in the 16 bit PNG format. Using any other bit PNG file will result in the map being distorted or repeated in CAW.
To convert the file you need to download the latest development version of GIMP, an image editing tool. Please note that the stable version of GIMP does not have the capabilities to change the bit size. For this tutorial I will be using the Windows 64-bit 2.92 development version. Install the .exe file that you have downloaded.
Inside the GIMP folder that you have just installed will be a run_gimp.bat file. Click on this to start the program. Two windows will open, you need both open while you use the program but you can ignore and minimize the GIMP Output window. However, don't close it until you are finished using GIMP and have closed the other main window.
Open up your downloaded height map.
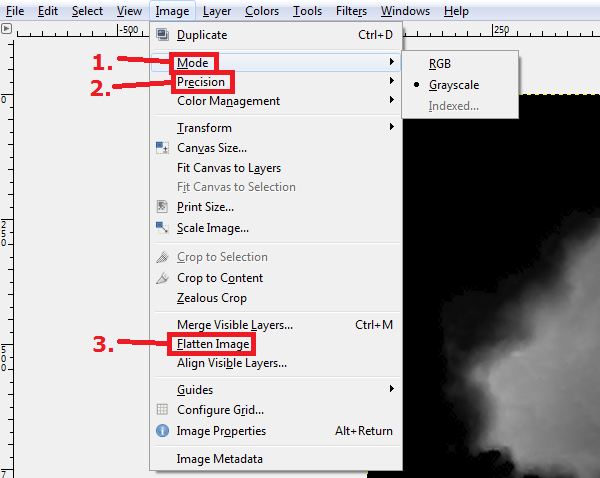
1. Select Image, then Mode, then Greyscale.
2. Select Image, then Precision, then 16 bit Integer.
3. Select Image, then Flatten Image.
Now save the image by clicking File, then Export as.
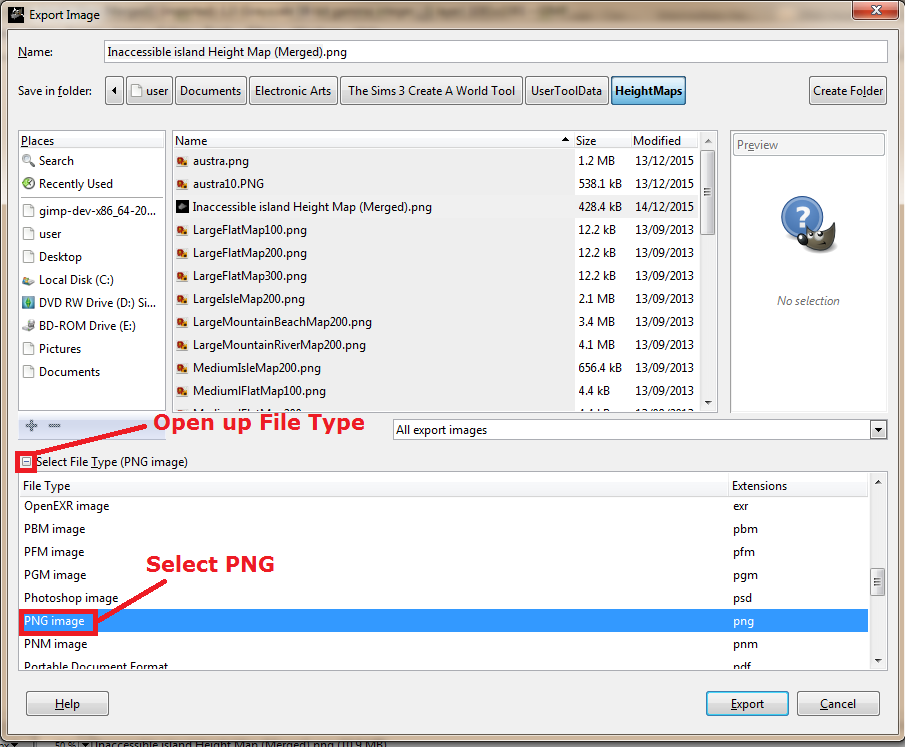
In the Export Image box that pops up, click the plus sign next to select File Type, then select PNG from the list. Finally click Export to save the image.
Check the image has been exported correctly by right clicking on the exported file, selecting properties and then details.

If the Bit depth is 16 then you have formatted it correctly.
Loading the height map in CAW[]
Place your image in the Height Maps folder in CAW. The location will be something like this: C:\Users\user\Documents\Electronic Arts\The Sims 3 Create A World Tool\UserToolData\HeightMaps
Now load up CAW. Select File, New World. Select your height map to use as the Image File. Select the desired characteristics of the world (maximum height, whether the world is lush or desert) and then click ok.
Your world will likely be very jagged, but this is a shortcoming of the way elevation data is obtained. This method is best used as a base to further sculpt the landscape to your liking.